# 插件开发
# 开始开发第一个插件
# 创建插件目录和文件
创建一个文件夹,写入以下几个文件,即可完成一个最简单的插件开发。
config.jsonindex.htmllogo.png
config.json
{
    "name": "MyPlugin",
    "title": "我的插件",
    "description": "这是一个测试插件",
    "version": "1.0.0",
    "logo": "logo.png",
    "main": "index.html",
    "actions": [
        {
            "name": "default",
            "type": "web",
            "matches": [
                "我的插件"
            ]
        }
    ]
}
2
3
4
5
6
7
8
9
10
11
12
13
14
15
16
17
index.html
<!doctype html>
<html lang="en">
<head>
    <meta charset="UTF-8">
</head>
<body>
<h1>hello world</h1>
</body>
</html>
2
3
4
5
6
7
8
9
logo.png
准备一个你喜欢的图片,重命名为 logo.png,尺寸为 128x128 放入到插件目录中。
# 加载插件到 FocusAny
插件管理 → 选择本地目录插件 ,选择刚刚创建的插件目录。

# 进入到插件
在 FocusAny 中输入 我的插件,即可看到刚刚创建的插件。
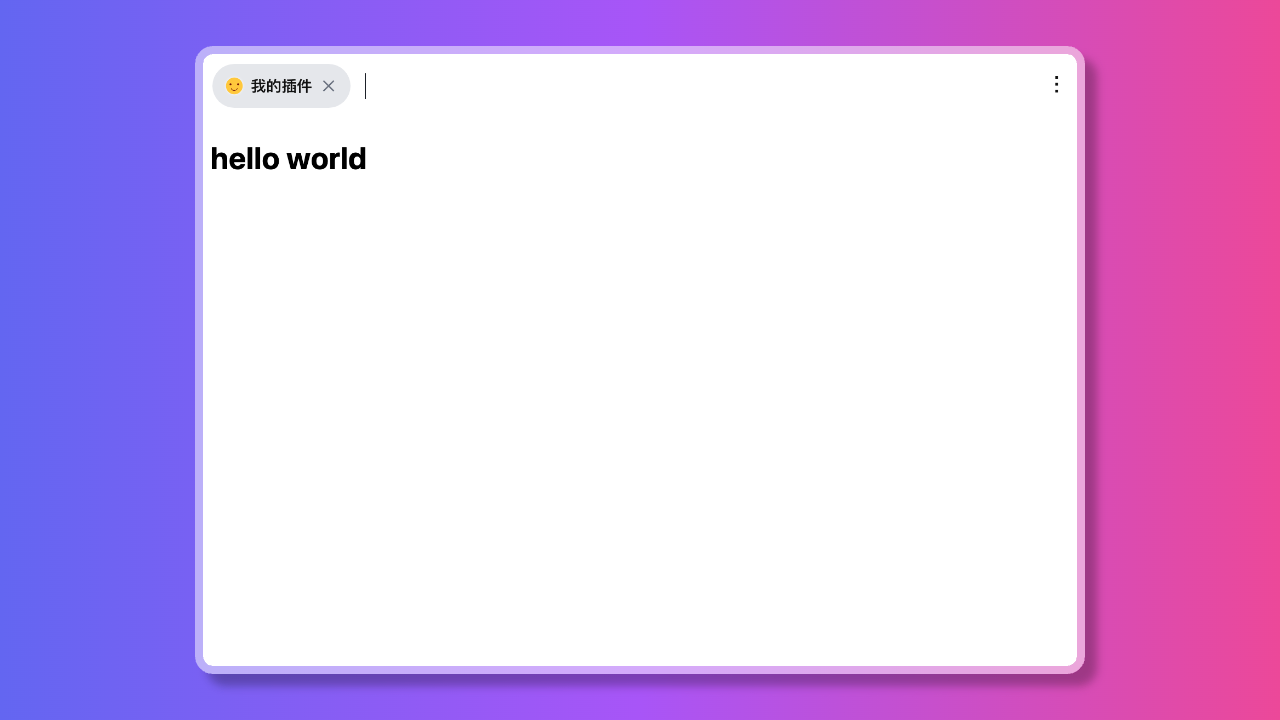
这样,一个最简单的插件就开发完成了 🎉🎉🎉
随后,你可以使用前端技术开发更丰富的功能,插件的每部分功能说明可以参考详细的配置。
# 发布到插件市场
# 插件开发与测试
开发好的插件目录应该包含所有已打包好的资源文件(包括 js、css、图片等)。
如果使用的是 vue、react 等框架,请在插件管理中重新添加打包目录(如 dist 或 build)验证插件是否正常。
# 注册账号和实名认证
- ① 在 focusany.com (opens new window) 注册账号
- ② 进入到个人中心,完成实名认证 focusany.com/member_cert (opens new window)
- ③ 实名认证完成之后,即可进入到插件市场发布插件
# 插件发布步骤
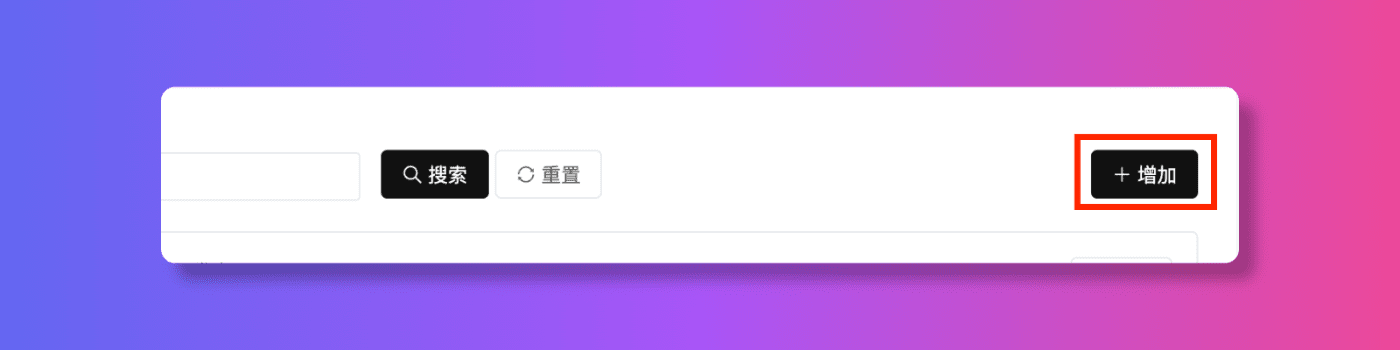
进入到 用户中心 → 开发的插件 页面,添加一个新的插件,填写插件的相关信息。


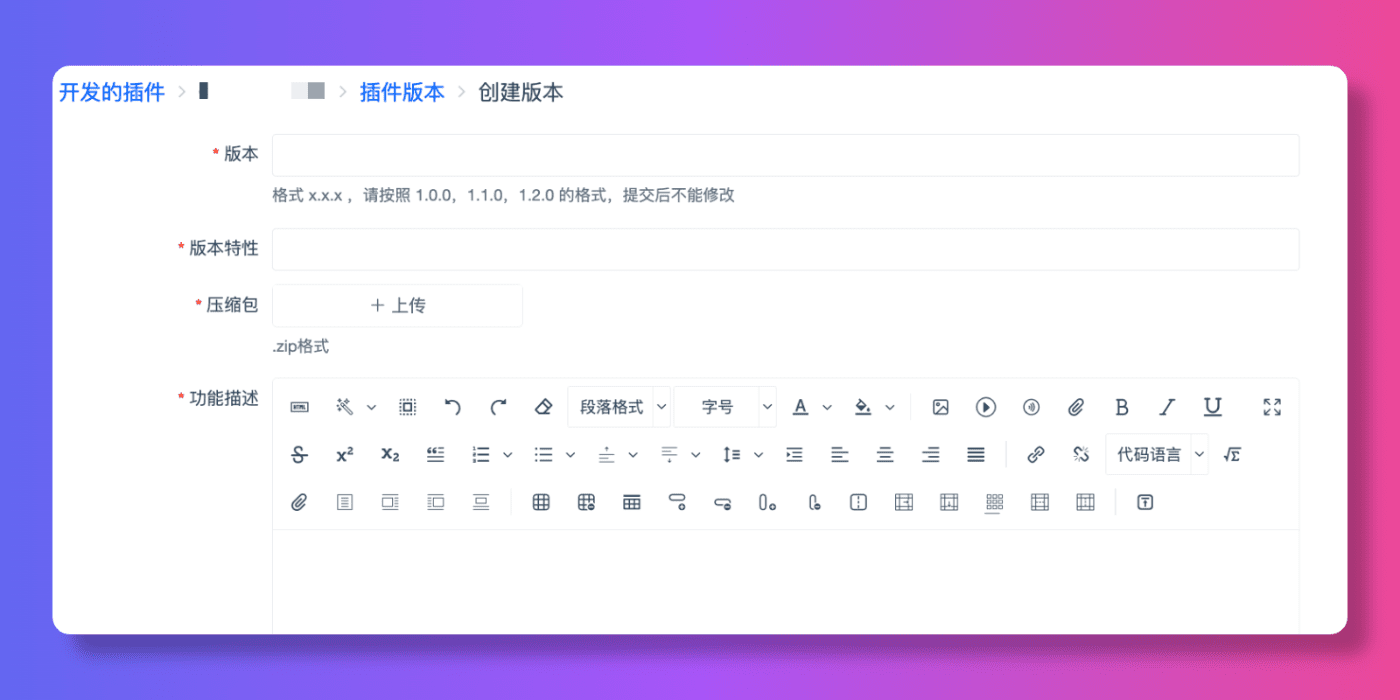
插件创建完成后,创建一个新的版本,上传插件的压缩包,等待审核通过后即可发布。


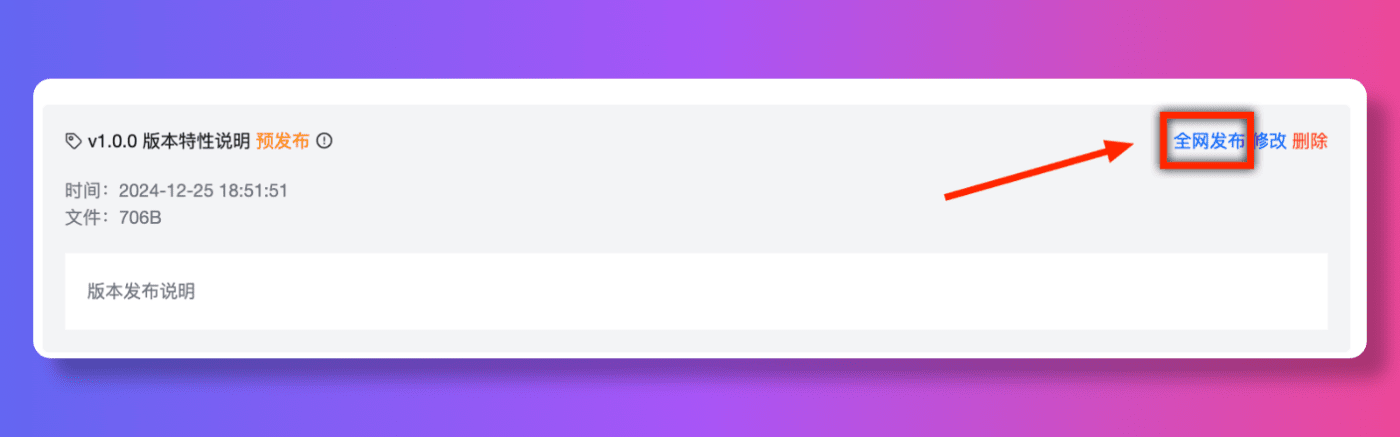
审核完成后,插件进入预发布状态,需要手动点击发布按钮,即可成功发布到插件市场。
# 插件的完整配置
{
    // 插件定义 schema,可以方便输入提示和校验
    "$schema": "https://focusany.com/sdk/config.schema.json",
    // 插件名称,整个平台唯一,格式为大写驼峰命名
    "name": "BasicExample",
    // 插件版本,格式为 主版本号.次版本号.修订版本号
    // 主版本号:功能大的升级
    // 次版本号:日常迭代功能更新
    // 修订版本号:修复 bug
    "version": "1.0.0",
    // 插件支持的平台,不填写则支持所有平台
    "platform": [
        "win",
        "osx",
        "linux"
    ],
    // 插件依赖的软件版本,如 * 或 >=1.0.0 或 <=1.0.0 或 >1.0.0 或 <1.0.0,此为选填,留空表示不限制 FocusAny 版本。
    "versionRequire": "*",
    // 插件标题,显示在插件列表中
    "title": "示例插件",
    // 插件 logo,尺寸为 128x128,相对于插件目录
    "logo": "logo.svg",
    // 插件说明
    "description": "示例插件说明",
    // 主入口文件
    "main": "index.html",
    // 快捷面板/智能视图 入口文件,当该配置为空时,使用主入口文件
    "mainView": "index.html",
    // 插件预加载文件,相对于插件目录,需要是 cjs 文件
    "preload": "preload.cjs",
    // 插件作者
    "author": "FocusAny",
    // 插件主页
    "homepage": "https://focusany.com",
    // 插件动作,描述了当 FocusAny 主输入框内容产生变化时,此插件应用是否显示在搜索结果列表中,
    // 一个插件应用可以有多个功能,一个功能可以提供多个命令供用户搜索。
    // 更多可参考 插件动作 和 插件匹配规则
    "actions": [
        // 打开插件(使用文本匹配)
        {
            "name": "text-simple",
            "title": "使用text匹配(简单)",
            "matches": [
                "example-text-simple"
            ]
        },
        // 打开插件(使用文本匹配)
        {
            "name": "text",
            "title": "使用text匹配",
            "matches": [
                {
                    "type": "text",
                    "minLength": 1,
                    "maxLength": 10,
                    "text": "example-text"
                }
            ]
        },
        // 打开插件(使用key匹配)
        {
            "name": "key",
            "title": "使用key匹配",
            "matches": [
                {
                    "type": "key",
                    "key": "example"
                }
            ]
        },
        // 打开插件(使用正则匹配)
        {
            "name": "regex",
            "title": "使用正则匹配",
            "matches": [
                {
                    "type": "regex",
                    "regex": "/example/"
                }
            ]
        },
        // 打开插件(使用文件匹配)
        {
            "name": "file",
            "title": "使用文件匹配(文件)",
            "matches": [
                {
                    "type": "file",
                    "minCount": 1,
                    "maxCount": 10,
                    "filterFileType": "file",
                    "filterExtensions": [
                        "xlsx",
                        "png"
                    ]
                }
            ]
        },
        // 打开插件(使用文件匹配)
        {
            "name": "file-directory",
            "title": "使用文件匹配(文件夹)",
            "matches": [
                {
                    "type": "file",
                    "minCount": 1,
                    "maxCount": 10,
                    "filterFileType": "directory"
                }
            ]
        },
        // 打开插件(使用窗口匹配)
        {
            "name": "window",
            "title": "使用窗口匹配",
            "matches": [
                {
                    "type": "window",
                    "nameRegex": "/iTerm2/"
                },
                {
                    "type": "window",
                    "titleRegex": "/Electron/"
                },
                {
                    "type": "window",
                    "attrRegex": {
                        "url": "/github.com/"
                    }
                }
            ]
        },
        // 打开插件(使用图片匹配)
        {
            "name": "image",
            "title": "使用图片匹配",
            "matches": [
                {
                    "type": "image"
                }
            ]
        },
        // 执行 code 代码
        {
            "name": "code",
            "title": "使用code匹配(简单)",
            "type": "code",
            "matches": [
                "example-code"
            ]
        },
        // 执行 backend 后台代码
        {
            "name": "backend",
            "title": "使用backend匹配(简单)",
            "type": "backend",
            "matches": [
                "example-backend"
            ]
        },
        // 执行命令
        {
            "name": "command",
            "title": "执行一个命令",
            "type": "command",
            "matches": [
                "example-command"
            ],
            "data": {
                "command": "notepad.exe"
            }
        },
        // 打开 快捷面板/智能视图
        {
            "name": "view",
            "title": "打开快捷面板/智能视图",
            "type": "view",
            "matches": [
                {
                    "type": "regex",
                    "regex": "/^\\s*[a-zA-Z0-9]+\\s*$/"
                }
            ],
            "data": {
                "showFastPanel": false,
                "showMainPanel": true
            }
        },
        // 打开 editor 文件编辑器
        {
            "name": "editor",
            "title": "使用editor匹配",
            "matches": [
                {
                    "type": "editor",
                    "extensions": [],
                    "fadTypes": [
                        "FileEditorExample"
                    ]
                }
            ]
        }
    ],
    // MCP 配置,描述了插件应用在 MCP 中的相关信息。
    "mcp": {
        "tools": [
            {
                "name": "example_tool",
                "description": "示例工具描述",
                "inputSchema": {
                    "type": "object",
                    "properties": {
                        "message": {
                            "type": "string",
                            "description": "输入消息"
                        }
                    },
                    "required": [
                        "message"
                    ]
                }
            }
        ]
    },
    // 插件设置
    "setting": {
        // 是否默认分离模式打开,默认为 false
        "autoDetach": false,
        // 分离模式默认位置,默认为 center,可选 center left-top left-bottom right-top right-bottom
        "detachPosition": "center",
        // 分离模式默认是否置顶,默认为 false
        "detachAlwaysOnTop": false,
        // 窗口高度,支持 数字 或 百分比,设置后窗口大小将默认为分离模式,默认为 600
        "height": "600",
        // 窗口宽度,支持 数字 或 百分比,设置后窗口大小将默认为分离模式,默认为 800
        "width": "800",
        // 快速面板高度,单位为像素,默认为 100
        "heightView": 100,
        // 是否只允许打开一个窗口,默认为 true
        "singleton": true,
        // 窗口缩放比例,100表示原始大小,默认为 100
        "zoom": 100,
        // 是否支持暗黑模式,默认为 false
        "darkModeSupport": false,
        // 是否使用 http 协议入口,默认为 false
        "httpEntry": false,
        // 是否启用远程Web缓存,默认为 false
        "remoteWebCacheEnable": false,
        // 分离模式更多菜单,默认为空
        "moreMenu": [
            {
                "name": "menu1",
                "title": "菜单1"
            }
        ],
    },
    // 插件权限
    "permissions": [
        // 允许访问剪贴板,如监听剪切板
        "ClipboardManage",
        // 允许访问 API
        "Api",
        // 允许访问文件系统
        "File"
    ],
    // 开发配置
    "development": {
        // 开发环境,prod 表示生产环境,dev 表示开发环境,prod 环境会忽略 development 的所有配置。
        "env": "prod",
        // dev环境 入口文件,通常为开发环境如 http://localhost:8080
        "main": "http://localhost:8080",
        // dev环境 快捷面板/智能视图快速面板入口文件,通常为开发环境如 http://localhost:8080
        "mainView": "http://localhost:8080/fastpanel.html",
        // dev环境 是否在插件加载完成后显示开发者窗口
        "showDevTools": false,
        // dev环境 是否在code执行完成后显示开发者窗口
        "showCodeDevTools": false,
        // dev环境 插件是否在code执行完成后保留开发者窗口
        "keepCodeDevTools": true,
        // dev环境 是否在快捷面板/智能视图渲染view时显示开发者窗口
        "showViewDevTools": true,
        // 更新日志文档,参照插件选择根目录,默认为 release.md,使用 markdown 格式,格式为【## x.x.x 功能特性[换行][换行]更新内容详情】使用 --- 分割多个。
        "releaseDoc": "release.md",
        // 插件内容文档,参照插件选择根目录,默认为 content.md,使用 markdown 格式。
        "contentDoc": "content.md",
        // 插件预览文档,参照插件选择根目录,默认为 preview.md,使用 markdown 格式,每行一个图片链接。
        "previewDoc": "preview.md"
    }
}
2
3
4
5
6
7
8
9
10
11
12
13
14
15
16
17
18
19
20
21
22
23
24
25
26
27
28
29
30
31
32
33
34
35
36
37
38
39
40
41
42
43
44
45
46
47
48
49
50
51
52
53
54
55
56
57
58
59
60
61
62
63
64
65
66
67
68
69
70
71
72
73
74
75
76
77
78
79
80
81
82
83
84
85
86
87
88
89
90
91
92
93
94
95
96
97
98
99
100
101
102
103
104
105
106
107
108
109
110
111
112
113
114
115
116
117
118
119
120
121
122
123
124
125
126
127
128
129
130
131
132
133
134
135
136
137
138
139
140
141
142
143
144
145
146
147
148
149
150
151
152
153
154
155
156
157
158
159
160
161
162
163
164
165
166
167
168
169
170
171
172
173
174
175
176
177
178
179
180
181
182
183
184
185
186
187
188
189
190
191
192
193
194
195
196
197
198
199
200
201
202
203
204
205
206
207
208
209
210
211
212
213
214
215
216
217
218
219
220
221
222
223
224
225
226
227
228
229
230
231
232
233
234
235
236
237
238
239
240
241
242
243
244
245
246
247
248
249
250
251
252
253
254
255
256
257
258
259
260
261
262
263
264
265
266
267
268
269
270
271
272
273
274
275
276
277
278
279
280
281
282
283
284
285
286
287
288
289
# 插件动作
# web 打开插件
系统会打开一个窗口,加载插件的 main 页面。
如果动作类型为空,默认为 web。
# code 代码执行
系统会打开一个渲染窗口,但是不会显示这个窗口,同时执行 preload.cjs 中定义的代码,比如在 preload.cjs
中定义了 plugin-example-code,那么在插件中就可以执行这个动作。
window.exports = {
    "code": {
        "plugin-example-code": async (data) => {
            console.log('plugin-example-code', data);
        }
    }
}
2
3
4
5
6
7
# backend 后端代码执行
系统会在 node 环境中执行 backend.cjs 中定义的代码,比如在 backend.cjs 中定义了 plugin-example-backend
,那么在插件中就可以执行这个动作。
window.exports = {
    "action": {
        "plugin-example-backend": async (data) => {
            console.log('plugin-example-backend', data);
        }
    }
}
2
3
4
5
6
7
# command 命令执行
系统会在主进程执行 data.command 定义的命令。
# view 快捷面板/智能视图
系统会在 快捷面板/智能视图 中打开插件的 mainView 页面。
# editor 文件编辑器
系统会在编辑器中打开 *.xxx.fadata 格式的文件,支持多种文件格式。
# 插件匹配规则
# text 文本匹配
使用简单的文字匹配,包括拼音、简写等。
{
    "name": "text",
    "title": "使用text匹配",
    "matches": [
        {
            "type": "text",
            "text": "匹配文字"
        }
    ]
}
2
3
4
5
6
7
8
9
10
也可简写为
{
    "name": "text-simple",
    "title": "使用text匹配(简单)",
    "matches": [
        "匹配文字"
    ]
}
2
3
4
5
6
7
# key 严格匹配
使用严格的匹配规则,只有完全匹配才会触发。
{
    "name": "key",
    "title": "使用key匹配",
    "matches": [
        {
            "type": "key",
            "key": "example"
        }
    ]
}
2
3
4
5
6
7
8
9
10
# regex 正则匹配
使用正则表达式匹配,可以匹配更复杂的规则。
{
    "name": "regex",
    "title": "使用正则匹配",
    "matches": [
        {
            "type": "regex",
            "regex": "/example/"
        }
    ]
}
2
3
4
5
6
7
8
9
10
# image 图片匹配
使用图片匹配,可以匹配图片中的内容。
{
    "name": "image",
    "title": "使用图片匹配",
    "matches": [
        {
            "type": "image",
            "minCount": 1,
            "maxCount": 10
        }
    ]
}
2
3
4
5
6
7
8
9
10
11
# file 文件匹配
使用文件匹配,可以匹配文件的类型、扩展名等。
{
    "name": "file",
    "title": "使用文件匹配(文件)",
    "matches": [
        {
            "type": "file",
            "minCount": 1,
            "maxCount": 10,
            // 匹配文件 file 或文件夹 directory
            "filterFileType": "file",
            "filterExtensions": [
                "xlsx",
                "png"
            ]
        }
    ]
}
2
3
4
5
6
7
8
9
10
11
12
13
14
15
16
17
# window 窗口匹配
使用窗口匹配,可以匹配窗口的标题、名称、属性等。
{
    "name": "window",
    "title": "使用窗口匹配",
    "matches": [
        {
            "type": "window",
            // 匹配窗口名称
            "nameRegex": "/iTerm2/"
        }
    ]
}
2
3
4
5
6
7
8
9
10
11
# editor 文件编辑器匹配
FocusAny 支持使用插件打开 *.xxx.fadata 格式的文件,快速打开编辑各种各样的文件。
更多可以参考 「editor 文件编辑器」 章节。
使用编辑器匹配,用户主动打开某个类型的文件可以触发。
{
    "name": "editor",
    "title": "使用editor匹配",
    "matches": [
        {
            "type": "editor",
            "extensions": [],
            "fadTypes": [
                "FileEditorExample"
            ]
        }
    ]
}
2
3
4
5
6
7
8
9
10
11
12
13
# preload.cjs 预加载代码
在浏览器开发时,是禁止执行一些本地操作的(比如读取文件、执行系统命令等),但是在插件中,我们可以通过 preload.cjs 文件来执行这些操作。
比如将以下代码写入到 preload.cjs 文件中,即可在插件中读取文件。
const fs = require("fs");

window.myFocusAnyApi = {
    readFile(path) {
        return fs.readFileSync(path, "utf8");
    },
};
2
3
4
5
6
7
# backend.cjs 后端代码
一个完整的 backend.cjs 文件示例:
module.exports = {
    "hook": {
        // 插件安装完成后触发,在 node 环境中执行
        "installed": async (focusany) => {
            focusany.showToast('插件已安装')
        },
        // 插件卸载前触发,在 node 环境中执行
        "beforeUninstall": async (focusany) => {
            focusany.showToast('插件即将卸载')
        },
    },
    "event": {
        // 插件事件,插件中可以通过 focusany.sendBackendEvent() 触发
        "testEvent": async (focusany, data) => {
            console.log('testEvent.focusany', focusany);
            console.log('testEvent.data', data);
            focusany.showToast('事件已触发');
            return "data from backend : " + JSON.stringify(data)
        }
    },
    "action": {
        // 插件动作,通过 backend 动作触发
        "plugin-example-backend": async (focusany, data) => {
            console.log('plugin-example-backend.focusany', focusany);
            console.log('plugin-example-backend.data', data);
            // console.log('test', await focusany.showSaveDialog());
            focusany.showToast('后台进程已执行');
            return 'ok'
        }
    }
}
2
3
4
5
6
7
8
9
10
11
12
13
14
15
16
17
18
19
20
21
22
23
24
25
26
27
28
29
30
31
随后在插件的页面中,就可以通过 window.myFocusAnyApi.readFile 函数来读取文件。
# editor 文件编辑器
FocusAny 或自动关联 *.xxx.fadata 格式的文件,支持用户一键打开,如果安装了对应插件的编辑器,将会默认使用插件打开文件完成编辑/查看。
通常建议使用以下两个文件后缀约定以方便区分是什么格式的文件,如
*.mind.fadata:思维导图文件*.flow.fadata:流程图- ...
一个完整的 .fadata 格式如下:
{
    // 文件类型,通常用于匹配打开的插件
    "type": "Xxx",
    "data": {
        // 纯文本
        "content": "文件内容",
        // 复杂对象
        "content": {
            "foo": "bar"
        },
        // 其他各种数据都可以存在 data 中...
    }
}
2
3
4
5
6
7
8
9
10
11
12
13
如何开发一个 editor 文件编辑器,可以参考示例工程 FileEditorExample
# 插件商品和付费
插件付费和商品一定是针对登录过的用户体系,FocusAny 作为一个中间层,负责插件的商品和支付的相关操作。
# 简化开发流程(插件端)
适合纯插件端简单的权限逻辑判断,使用这种方式是纯前端判断,需要对插件代码逻辑进行加密避免用户破解。
① 调用付费购买接口
const result = await focusany.openGoodsPayment({
    // 插件商品ID
    goodsId: 'xxx',
    // 插件商品价格,固定价格商品无需传入,动态价格商品需传入价格,如 0.01
    price: '0.01',
    // 第三方订单号,字符串,最大长度 64 字符
    outOrderId: 'xxxx',
    // 参数数据,长度不超过 200 字符
    outParam: 'xxxx',
});
// result.paySuccess 是否支付成功,注意,支付是否成功需要依赖服务端的回调,此处仅作参考
2
3
4
5
6
7
8
9
10
11
③ 查询是否支付成功
可以根据 goodsId 查询某个商品是否购买成功,用来判断是否具有某个权限。
const result = focusany.queryGoodsOrders({
    // 插件商品ID,可选
    goodsId: 'xxx',
    // 分页页码,从 1 开始,可选
    page: 1,
    // 分页大小,可选,默认是 10
    pageSize: 10,
})
2
3
4
5
6
7
8
结果示例
{
    "total": 1,
    "page": 1,
    "records": [
        {
            // 订单号
            "id": "xxxx",
            // 插件商品ID
            "goodsId": "xxx",
            // 状态 Paid: 已支付, Unpaid: 未支付
            "status": "Paid"
        }
    ]
}
2
3
4
5
6
7
8
9
10
11
12
13
14
# 完整流程(插件端 和 服务端)
适合严格的服务端权限校验,需要开发 http 服务端。
# 准备工作
① 在 官网 → 插件商品 (opens new window) 创建商品。
② 在 官网 → 开发者设置 (opens new window) 中设置 商品支付回调 和 AppSecret。
# 插件端开发
① 获取AccessToken
const result = await focusany.getUserAccessToken();
// result.token 请求Token
// result.expireAt 过期时间
2
3
⑥ 调用付费购买接口
const result = await focusany.openGoodsPayment({
    // 插件商品ID
    goodsId: 'xxx',
    // 插件商品价格,固定价格商品无需传入,动态价格商品需传入价格,如 0.01
    price: '0.01',
    // 第三方订单号,字符串,最大长度 64 字符
    outOrderId: 'xxxx',
    // 参数数据,长度不超过 200 字符
    outParam: 'xxxx',
});
// result.paySuccess 是否支付成功,注意,支付是否成功需要依赖服务端的回调,此处仅作参考
2
3
4
5
6
7
8
9
10
11
# 服务端开发
③ 根据AccessToken获取用户信息
发送 POST 请求到 https://focusany.com/server/user_info ,参数如下
{
    "pluginName": "Xxx",
    "timestamp": "时间戳",
    "token": "xxxxxx",
    "sign": "xxx"
}
2
3
4
5
6
签名 sign 进行校验, 签名计算方式如下
// ① 对参数按照 key=value 的格式,并按照参数名 ASCII 字典序排序如下
param = "pluginName=xx×tamp=xx&token=xx"
// ② 拼接API密钥,其中 xxxxxxxxxxxxxx 为 AppSecret
paramWithSecret = param + "&app_secret=xxxxxxxxxxxxxx"
// ③ 计算MD5签名
sign = md5(paramWithSecret)
2
3
4
5
6
⑧ 回调通知支付成功
用户成功购买商品后,会向 商品支付回调 发送一个 POST 请求(application/json格式)。
包含以下参数:
{
    // 订单ID,FocusAny 平台唯一ID
    "orderId": "xxx",
    // 第三方订单号
    "outOrderId": "xxxx",
    // 参数数据
    "outParam": 'xxxx',
    // 实际支付金额,固定价格商品为设置的价格,动态价格为调用时传的价格
    "feeTotal": "0.01",
    // 状态 已支付 COMPLETED,待支付 WAIT_PAY
    "status": "COMPLETED",
    // 时间戳,单位秒
    "timestamp": 1672531199,
    // 用户OpenId
    "openId": "xxxx",
    // 签名
    "sign": "32位MD5"
}
2
3
4
5
6
7
8
9
10
11
12
13
14
15
16
17
18
服务端需要对回调的签名 sign 进行校验, 签名计算方式如下
// ① 对参数按照 key=value 的格式,并按照参数名 ASCII 字典序排序如下
param = "feeTotal=xx&openId=xx&orderId=xx&outOrderId=xx&outParam=xx&status=xx×tamp=xx"
// ② 拼接API密钥,其中 xxxxxxxxxxxxxx 为 AppSecret
paramWithSecret = param + "&app_secret=xxxxxxxxxxxxxx"
// ③ 计算MD5签名
sign = md5(paramWithSecret)
2
3
4
5
6
# 插件开发示例
示例代码已经上传到 Gitee 和 Github,可以直接根据地址查看。
| 示例 | 描述 | 地址 |
|---|---|---|
| 基础示例工程 | 纯JS+HTML,所有API演示 | Gitee (opens new window) Github (opens new window) |
| Editor文件编辑器示例工程 | TS+VUE3 | Gitee (opens new window) Github (opens new window) |
| React示例工程 | TS+React | Gitee (opens new window) Github (opens new window) |
| Vue示例工程 | TS+VUE3 | Gitee (opens new window) Github (opens new window) |
| Web远程示例工程 | 远程Web应用集成 | Gitee (opens new window) Github (opens new window) |
# Bare
最基础的插件结构,只包含必要的配置文件和入口文件,用于快速开始插件开发。
# BasicExample
原生 HTML、CSS、JS 开发,无任何框架,可以查看到最基础的插件开发方式。
# FileEditorExample
基于 vue3 + vite + tailwindcss 开发的基础文件编辑器,可以使用很轻量的方式集成一些文件编辑器。
# VueExample
基于 vue3 + vite + tailwindcss 开发的插件示例,可以查看到如何使用 vue3 开发插件。
# ReactExample
基于 react + vite + tailwindcss 开发的插件示例,可以查看到如何使用 react 开发插件。
# WebRemoteExample
演示如何将现有的 Web 应用集成到 FocusAny 插件中,将单页系统的所有静态资源都缓存到本地,方便离线使用。